How to Set Up an MTProto Proxy for Telegram: Step-by-Step Guide
MTProto for Telegram is the most popular proxy for uninterrupted messenger operation. This proxy is the official Telegram protocol.
In this 3-step guide, you will learn how to quickly install an MTProto proxy for Telegram on a rented server and connect it to your messenger.
Requirements for Installing an MTProto Proxy for Telegram
Minimum requirements
- Operating system: Ubuntu 20.04 / 22.04 (clean installation)
- Server (VPS): 1 core, 512 MB RAM — that's enough
- SSH access (root or a user with sudo)
- Open port 443 (needed for HTTPS masquerading)
The entire guide will be based on the example of the Aeza provider. You can use any other provider that offers VPS server rental in Europe.
So, let's go:
Step 1 — Rent an overseas server and connect
Register at Aeza.net and go to the menu on the left, add a service (see the screenshot, underlined in red). In the center, choose a location, look for Europe with a price of 5.93 euros; in the screenshot, Vienna is selected as an example.
On the right, check that backups are disabled — they are not needed, highlighted with a rectangle in the screenshot. Auto-renewal is optional.
Scroll down a bit and switch to Ubuntu 20.04 / 22.04; by default it's 26.04, which is still raw — you must switch it!
Nothing else needs to be installed; a clean OS is required.
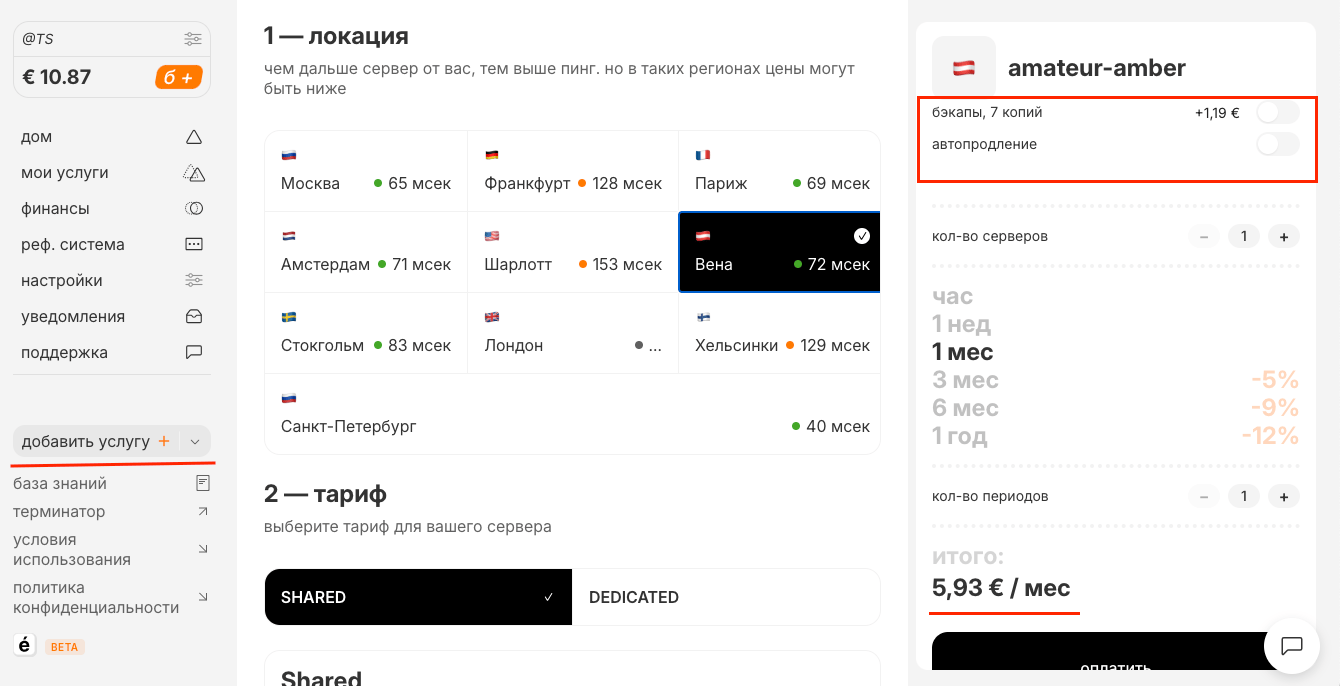
Renting a server in the Aeza panel
Next, click pay. Payment is available from ruble cards to cryptocurrencies.
After payment, they open from 2 to 15 minutes, which is notified by email. Next, go to the left menu to the "My Services" tab:
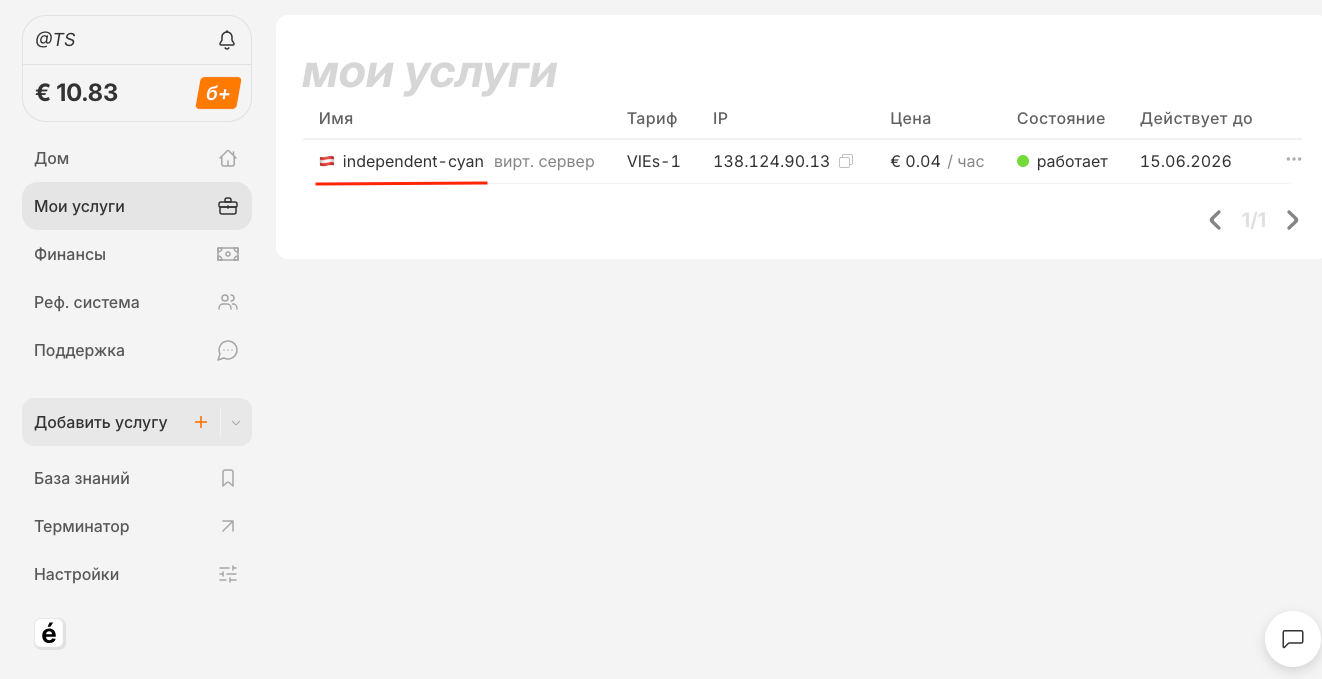
"My Services" tab in the Aeza panel
And click on the server name, underlined in red. A window with login data will open, see the screenshot.
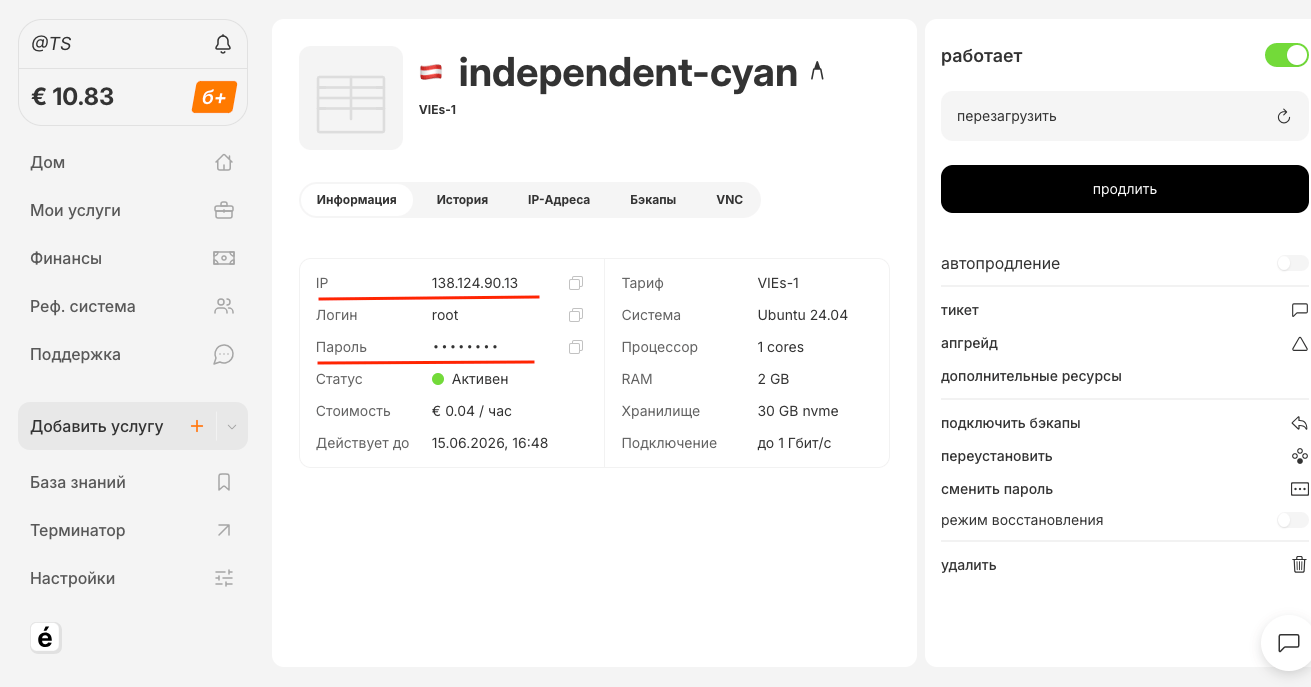
Server data: IP, login, password
The data will be in this format:
- ip: 86.163.135.43 (your server IP will be different);
- login: root (most often the login is like this);
- password: E7D4sF3csSjg (your server password will be different);
To configure the server, you will need access to the server itself with the data (login, password, and IP address, so it's important to save them). All this is done from a computer (I haven't tested it from a phone — maybe it's possible, write in the comments), under Windows or macOS.
On Windows, you will need a special program; macOS owners will use the built-in terminal.
So, let's go:
Windows — download and install the program to connect to our server: go to https://www.putty.org/, download and install. After installation, a shortcut will appear on the desktop; launch it as shown in the screenshot.
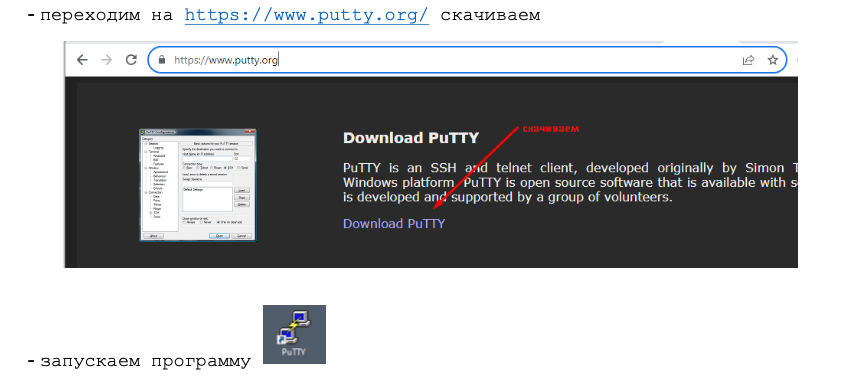
Installing and launching Putty on Windows
Connect to our server, enter the server IP, port 22, and click Open, as shown in the figure below.
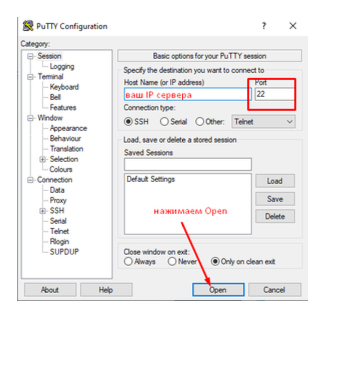
Connecting to the server via Putty
Next, go to the Connection tab and in the first line, in the input field, enter any number from 20 to 50, for example 50, as shown in the figure.
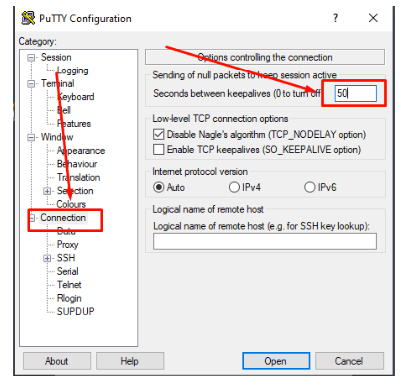
Configuring Connection parameters in Putty
Click Open
When you log into the server for the first time, you need to click Accept in the window that appears. Then, in the next window, enter the login and password one by one, pressing Enter each time.
ATTENTION! when entering the password, characters are not displayed on the screen — this is normal. To paste the copied password — just right-click once (right mouse button) in the authorization window on the black background and then press Enter, see the screenshot.
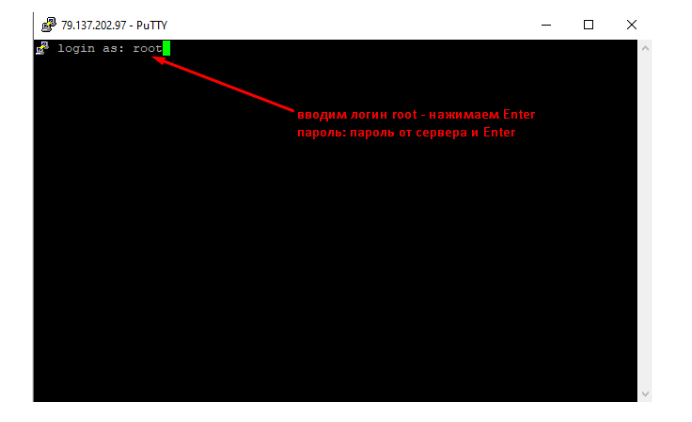
Entering login and password in Putty
If the connection is successful, system data will load and you will get a prompt to issue commands to your server. In the example below, this is the prompt on the very last line and looks like — root@TESTVDS:~# This line means that the server is ready to accept and execute your commands.
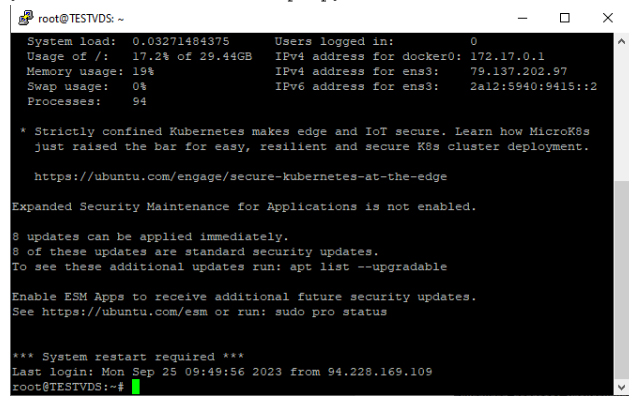
Successful connection to the server
All good, the connection is established, go a bit lower, next is the instruction for macOS. Although I recommend reviewing the instruction and understanding the beauty of using Macs.
macOS — if you have a Mac, then we will use the built-in terminal, since there is no point in installing third-party programs just to log into the server once for a couple of minutes.
So, in Launchpad, type the word Terminal in the search, and you'll see this
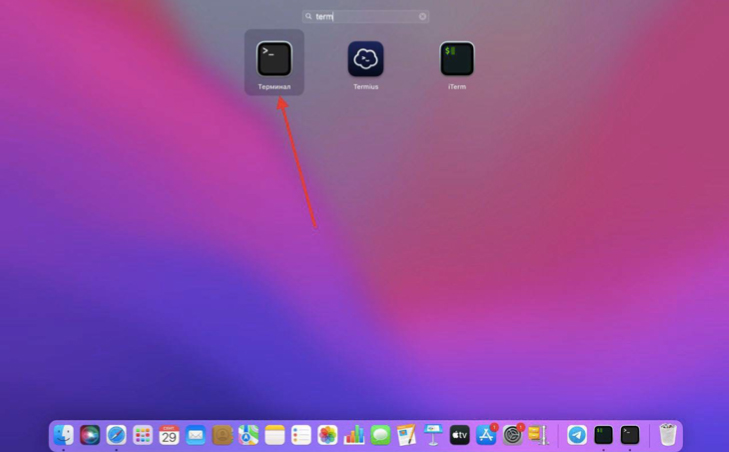
Searching for Terminal on macOS
Open the terminal, type the command, and press Enter
ssh your_login@server_IP_address
that is, if my login is root and the server IP is 79.137.202.97, then the command in the terminal will be
ssh root@79.137.202.97
next, paste the password, press Enter — done.
If the connection is successful, it should look like in the screenshot — root@server_name.
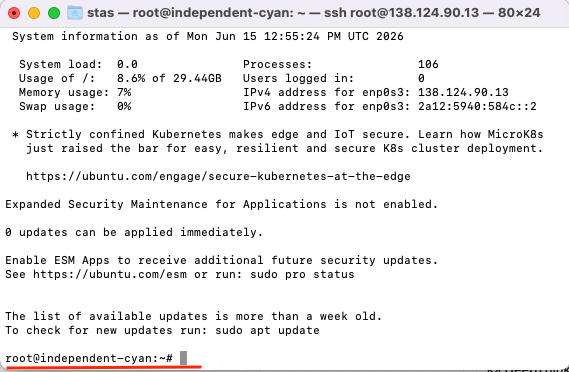
Connecting to the server via macOS terminal
Step 2 — Configure the MTProto Proxy Server for Telegram
Next, you need to enter just one command and press Enter:
sudo apt update && sudo apt upgrade -y && sudo apt install docker.io ufw -y && sudo ufw allow OpenSSH && sudo ufw allow 443/tcp && sudo ufw --force enable && SECRET=$(docker run --rm nineseconds/mtg:2 generate-secret --hex google.com) && docker run -d --name mtg --restart=always -p 443:443 nineseconds/mtg:2 simple-run -n 1.1.1.1 -i prefer-ipv4 0.0.0.0:443 "$SECRET" && echo "✅ READY LINK: tg://proxy?server=$(curl -s ifconfig.me)&port=443&secret=$SECRET"
The command is entered in full, without spaces, as is. During installation, a question will be asked; you must answer — yes. Then 3 or 4 windows will pop up, as shown in the screenshot below; you need to press Enter four times.
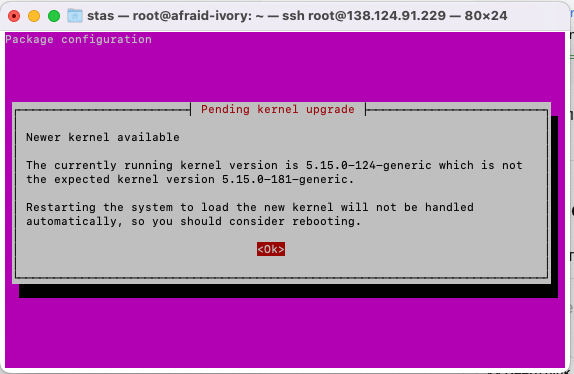
Installation confirmation request
The result of the installation will be a ready European server with an MTProto proxy for Telegram. See the screenshot below.
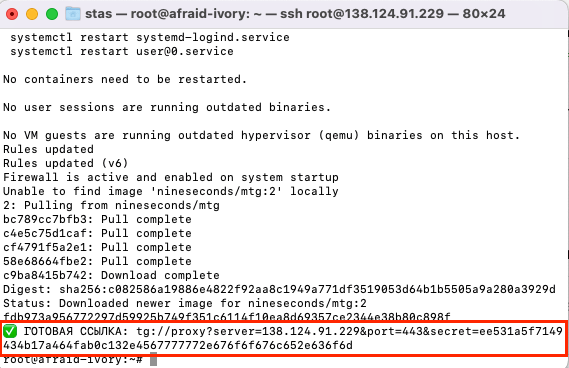
Ready MTProto proxy on the server
That's it, the installation is complete.
What this command does and installs on your server:
- Updates the package list
- Installs all system updates
- Installs the curl utility
- Docker is installed automatically
- Configures the MTProto proxy on port 443
- Enables Fake TLS technology — masquerading as regular HTTPS
- Generates a secret key
All this takes 1–2 minutes. Just wait.
Next, copy the full link for Telegram — tg://proxy?server=194.33.35.192&port=443&secret=ee3a44c56ab55a1a368eb3b260a2550432676f6f676c652e636f6d
And bring it to the form shown in the screenshot
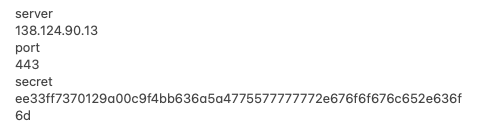
Data for connecting the proxy in Telegram
Be careful! Server = numbers, port = numbers, secret = the whole gibberish!
Send this data to your phone or scan the QR code. You can safely connect 50 — 70 devices and even earn money on this.
Step 3 — Connecting the MTProto Proxy for Telegram
Go to the settings menu and find — Data and Storage, as shown in the screenshot, and tap on this item.
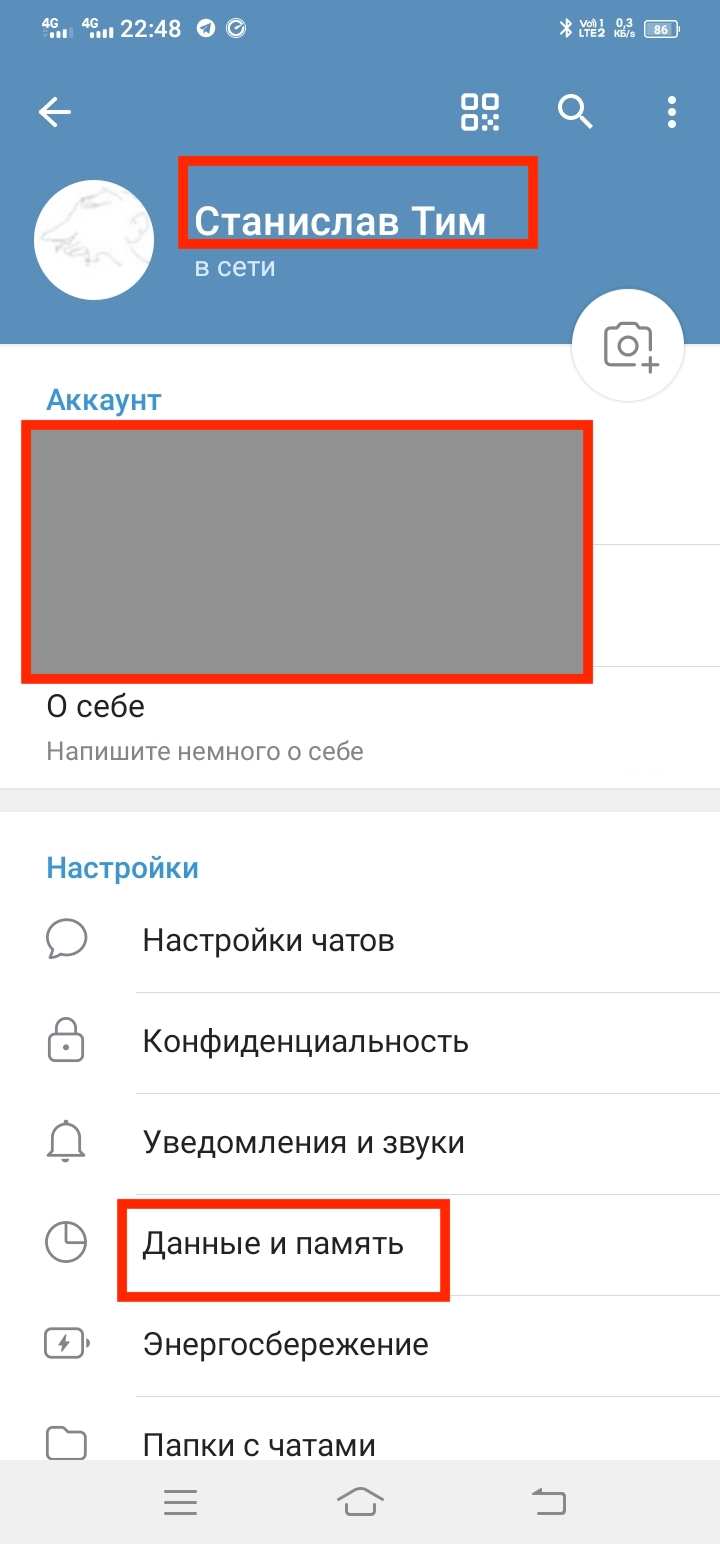
"Data and Storage" menu in Telegram
Next, in the next window, scroll down and find the item — Proxy Settings, see the screenshot.
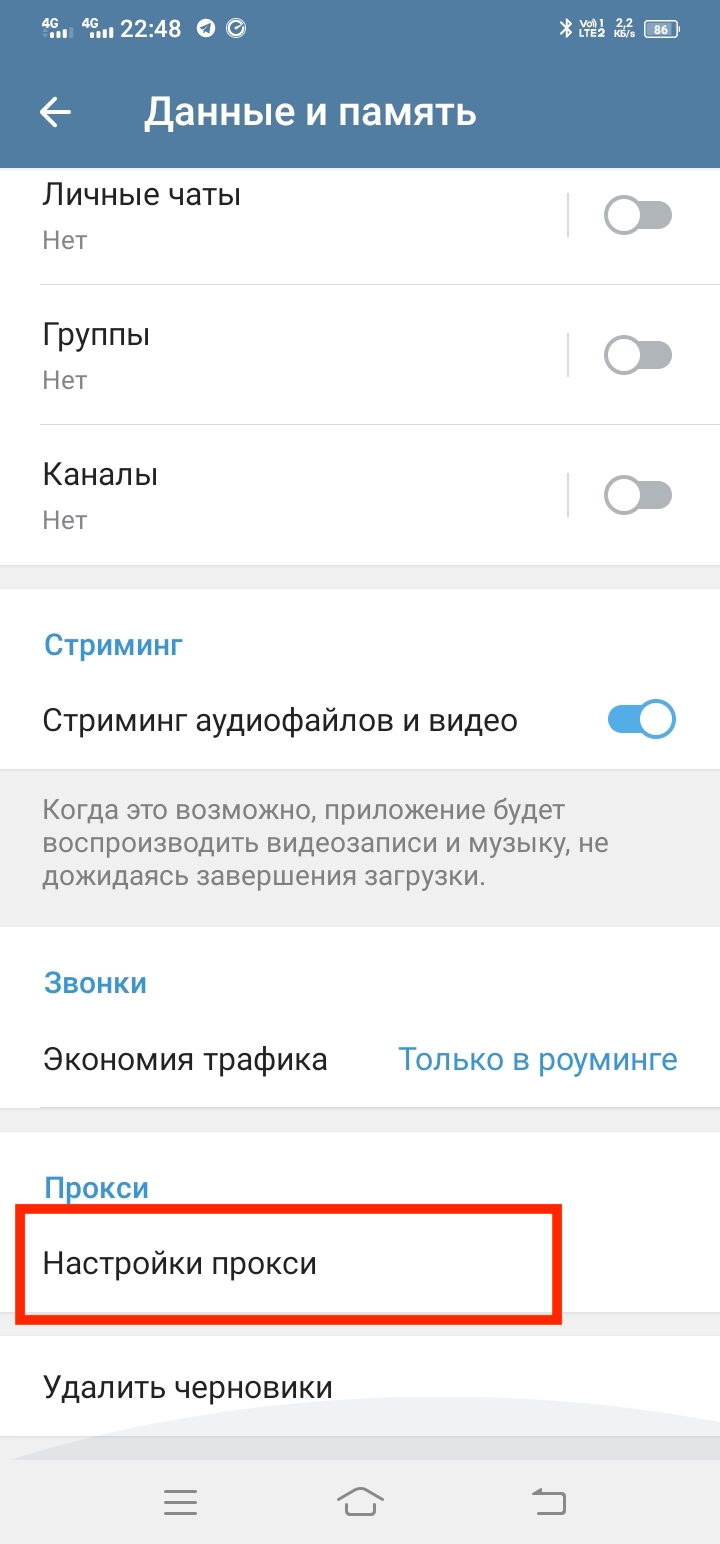
"Proxy Settings" item in Telegram
Tap on it and you will get to the window for configuring your proxy
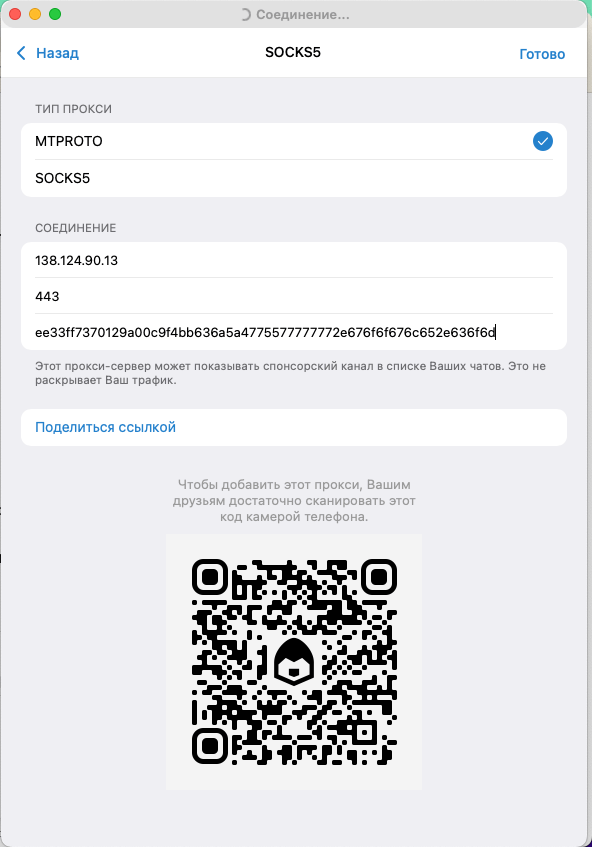
Proxy configuration window in Telegram
Paste the prepared data, as shown in the screenshot above. Server address, port, and secret key. You should see the following:
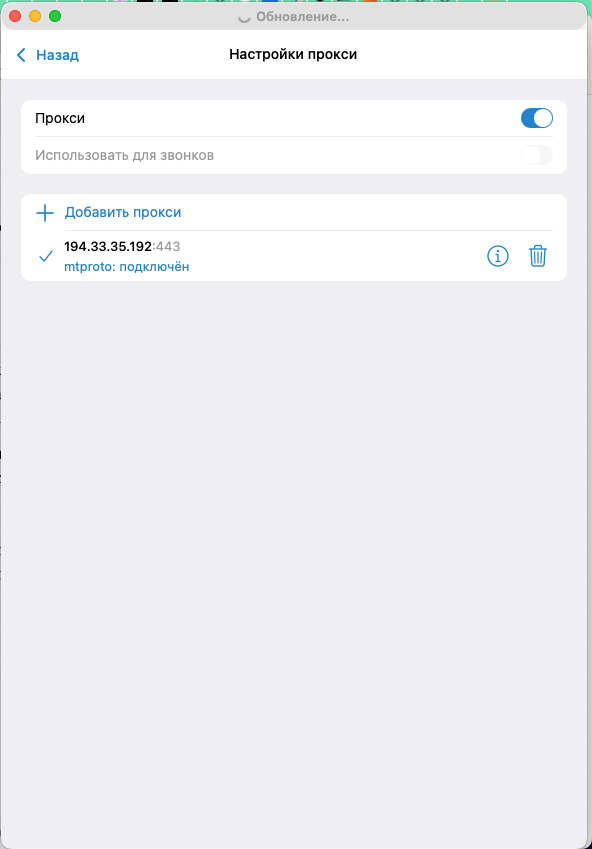
Connecting the proxy in Telegram
Launch your Telegram on your phone or PC. The connection should work, and Telegram will start working. It may take a couple of minutes on the first connection while chats update.
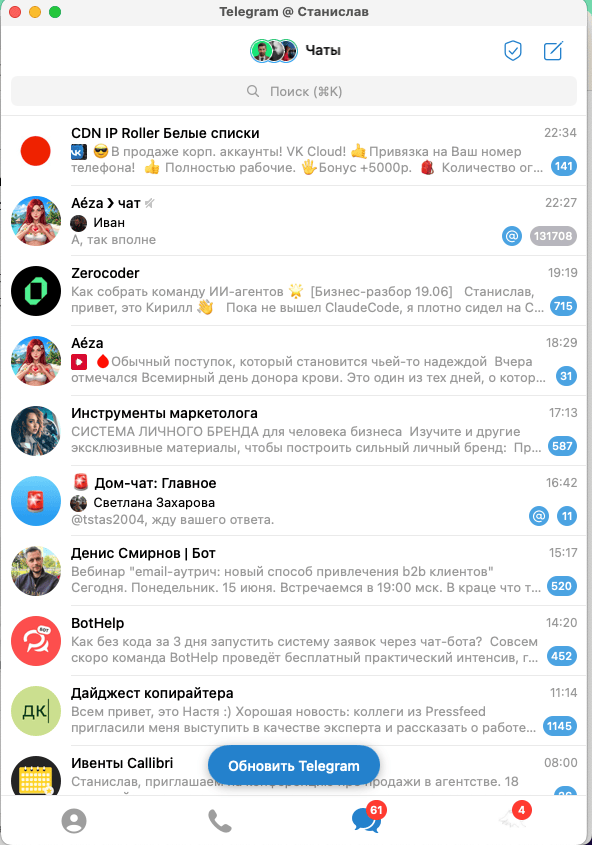
Working Telegram via MTProto proxy
Conclusion
You have successfully completed all 3 steps:
- ✅ Rented a VPS in Aeza
- ✅ Installed the MTProto proxy with one command
- ✅ Got the link and connected Telegram
Now you have your own private MTProto proxy for Telegram — stable, fast, and secure.
FAQ — frequently asked questions
1. Can I install MTProto on Windows?
Yes, but the instruction is more complicated. For simplicity and stability, it's better to use Ubuntu on a VPS.
2. How much traffic does the proxy consume?
Almost all traffic depends on you — how much you use Telegram. Usually no more than 2-3 GB per month.
3. How do I remove the proxy?
On the server, run:
docker stop mtproto-proxy && docker rm mtproto-proxy
4. Do I need to renew the server every month?
Yes, it's a rental. If you don't renew it, the proxy will turn off. Telegram will simply stop connecting, and you'll return to regular internet without a proxy.
I hope I managed to explain how to set up MTProto for Telegram.
Leave a comment
Ask questions, share your experience or suggestions
All comments are moderated before publication.